Hello fellow yarn enthusiasts and creative souls! Are you ready to embark on a delightful crochet adventure? Today, we’re diving into the wonderfully whimsical world of amigurumi with our Crochet Snail Idea and Patterns! Imagine a plump, happy snail, its shell a swirl of charming colors and its little antennae perked up, ready to explore your crafting space. These adorable critters are not just incredibly cute, but they’re also surprisingly simple to create, making them the perfect project for beginners eager to dip their toes into the world of stuffed toys.
Whether you’re looking for a unique handmade gift that will bring a smile to anyone’s face, a delightful addition to your home decor, or simply a fun way to relax and create, our snail pattern is sure to inspire. Get ready to learn easy-to-follow instructions, master basic amigurumi techniques, and bring these slow-moving friends to life stitch by stitch. Let’s get our hooks ready!
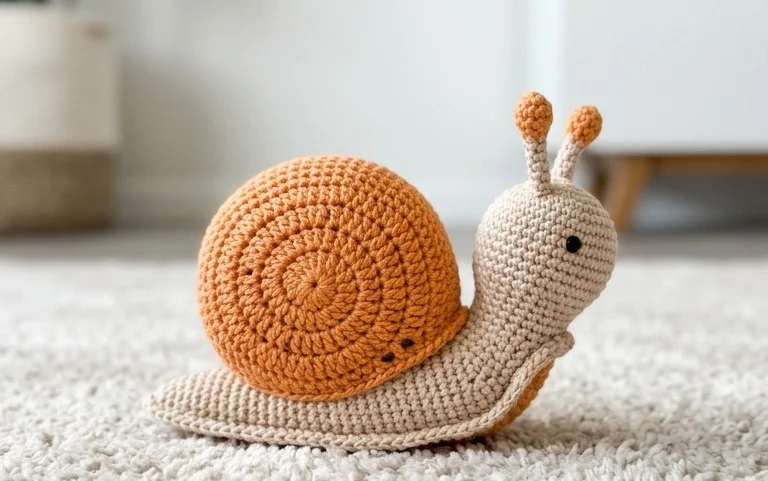
Crochet Snail Amigurumi: A Whimsical Woodland Friend for Your Hook!
Oh, to crochet a snail! There’s something incredibly charming and endearingly slow about these little gastropods, making them perfect subjects for amigurumi. Imagine a tiny, coiled shell, a sweet little face, and maybe even some jaunty antennae – a crochet snail amigurumi is an instant mood-booster and a delightful project for crafters of all levels. Whether you’re looking for a cute companion for your desk, a unique gift, or just a fun way to practice your amigurumi skills, this article is your go-to guide for bringing these slow-moving wonders to life.
Yarn and Hook Recommendations: The Building Blocks of Your Snail
The yarn and hook you choose will significantly impact the final look and feel of your crochet snail. For amigurumi, it’s generally best to opt for yarns that are tightly spun and have a smooth texture. This helps to create a firm fabric that won’t leave gaps, preventing the stuffing from showing through.
Yarn Types:
Cotton Yarn: This is a fantastic choice for amigurumi. It’s durable, washable, and holds its shape well. Look for mercerized cotton for a slight sheen, or unmercerized for a more matte, natural look. Worsted weight or DK weight cotton yarns are excellent starting points.
Acrylic Yarn: A budget-friendly and widely available option. Many acrylic yarns are soft and come in a vast array of colors. Choose a good quality acrylic that doesn’t split easily. Again, worsted or DK weight are ideal.
Blends: Cotton-acrylic blends can offer the best of both worlds – the structure of cotton with the softness of acrylic.
Hook Size: The key to tight amigurumi stitches is to use a hook that is one or two sizes smaller than what is recommended on your yarn label. For example, if your yarn suggests a 4mm hook, try using a 3mm or 3.5mm hook. This will create dense stitches, ensuring your stuffing stays hidden and your snail has a solid form. Experimentation is key here, as yarn brands can vary in their actual thickness.
Color Choices: For a classic snail look, you’ll likely want a yarn for the shell (browns, creams, muted greens) and another for the body (grays, whites, light blues, or even something more whimsical!). Don’t be afraid to play with contrasting or complementary colors to make your snail truly unique.
Essential Crochet Techniques for Your Snail
Creating a crochet snail involves a few fundamental amigurumi techniques. Don’t worry if you’re new to these; they are straightforward to learn and incredibly rewarding!
Magic Ring (or Magic Circle): This is the foundation for most amigurumi pieces. It creates a tight, adjustable starting circle that eliminates the unsightly hole often left by chaining and working into the first chain.
Single Crochet (sc): The workhorse of amigurumi! You’ll be using single crochet stitches almost exclusively to build your snail’s shape.
Increasing (inc): To make your snail grow wider, you’ll work two single crochet stitches into the same stitch. This is often denoted as “2 sc in next stitch.”
Decreasing (dec): To make your snail narrower and close off shapes, you’ll work a single crochet stitch over two stitches. The most common amigurumi decrease is the “invisible decrease,” which involves working into the front loops of the next two stitches. This creates a neater finish than a standard decrease.
Working in the Round: Amigurumi is almost always worked in continuous spirals, not in joined rounds. This means you’ll keep crocheting in a spiral without joining at the end of each round. A stitch marker is essential to keep track of the beginning of each round.
Stuffing: Polyester fiberfill is the standard stuffing for amigurumi. You’ll want to stuff your snail firmly but not so tightly that it distorts the stitches. Stuff as you go to ensure an even shape.
Whipping Stitch (or Mattress Stitch): This is used to invisibly sew the different parts of your snail together (body to shell, for example).
Embroidery: For the snail’s face (eyes and mouth), you’ll use embroidery floss and a yarn needle to add those charming details.
Tips and Tricks for Beginner Snail Crocheters
Embarking on your first amigurumi project can feel a little daunting, but with a few handy tips, you’ll be snail-making like a pro in no time!
Master the Magic Ring: Practice making the magic ring a few times before you start. There are tons of excellent video tutorials online that can show you exactly how it’s done.
Use a Stitch Marker: Seriously, don’t skip this! It’s your best friend when working in continuous rounds. Place it at the beginning of each round to easily see where to start the next one.
Stuff as You Go: Don’t wait until the very end to stuff your snail. Add stuffing gradually as you crochet each section. This helps prevent lumps and ensures a smooth, even shape.
Stuffing Density: Aim for firm but not overstuffed. Your snail should hold its shape without being rigid. You can always add a little more stuffing if needed.
Invisible Decreases: Practice these! They make a huge difference in the neatness of your amigurumi.
Weave in Ends Securely: When you finish a color or a section, make sure to weave in your ends thoroughly to prevent them from unraveling.
Don’t Be Afraid to Frogging: “Frogging” is crochet slang for ripping out stitches. If you make a mistake, it’s okay to go back and fix it. It’s all part of the learning process!
Start Simple: This snail pattern is a great beginner project because it’s made of relatively simple shapes. Focus on getting the stitches and techniques right.
Customization: Making Your Snail One-of-a-Kind
The beauty of crochet is its versatility! You can easily adapt this snail pattern to create a whole collection of unique friends.
Color Combinations:
Rainbow Snail: Use a different bright color for each stripe of the shell.
Monochrome Magic: Stick to different shades of the same color for a sophisticated look.
Polka Dot Snail: Alternate colors in the shell for a fun polka dot effect.
Ombre Shell: Transition through shades of one color for a gradient effect in the shell.
Shell Textures: Instead of just plain rounds for the shell, you could try incorporating textured stitches like bobbles, puffs, or even cabling (though this might be for more advanced crocheters).
Antennae Variations:
Long and Curly: Crochet longer antennae and gently curl them around a pencil or dowel rod.
Beaded Antennae: Thread small beads onto the antennae before finishing them off.
Button Eyes: Instead of embroidered eyes, sew on small buttons for a different look.
Size Matters:
Smaller Snail: Use a finer weight yarn (like sport weight or fingering weight) and a smaller hook. This will result in a tiny, pocket-sized snail perfect for keychains or charms.
Larger Snail: Use a bulkier yarn (like bulky or super bulky) and a larger hook. You’ll have a big, huggable snail friend in no time! Remember to adjust stuffing quantities accordingly.
Caring for Your Crochet Snail
Once your adorable snail is complete, you’ll want to keep it looking its best. Amigurumi is generally quite durable, but a little care goes a long way.
Washing: For most cotton or acrylic yarns, a gentle hand wash is recommended. Use cool water and a mild detergent. Avoid harsh chemicals or bleach.
Drying: Gently squeeze out excess water (don’t wring, as this can distort the shape). Lay your snail flat on a clean towel or a mesh drying rack to air dry completely. Keep it out of direct sunlight, which can fade colors.
Spot Cleaning: For minor stains, you can often spot clean with a damp cloth and a tiny bit of mild soap.
Fluffing: If your snail starts to look a little squashed over time, you can gently reshape it and fluff up the stuffing by hand.
Project Ideas: Where Will Your Snail Journey?
Your crocheted snail can be so much more than just a decorative item. Here are some delightful project ideas to inspire you:
Desk Buddy: Place it on your desk to bring a smile to your face during your workday.
Pincushion: Add some extra stuffing and maybe a flat base, and your snail becomes a charming pincushion for your sewing station.
Gift for Little Ones: Amigurumi makes wonderful, huggable toys for children. Ensure all safety eyes are securely attached or opt for embroidered eyes for very young children.
Keychain or Bag Charm: Make a smaller version and attach a keyring or a sturdy clasp.
Home Decor Accent: Group a few snails in different colors and sizes to create a whimsical display on a shelf or mantelpiece.
Part of a Diorama: Imagine your snail exploring a crocheted garden or woodland scene!
Sensory Toy: Different yarn textures can make your snail an interesting sensory toy for babies and toddlers (again, with safety in mind).
So, gather your yarn, grab your hook, and get ready to create your very own slow-moving, charming crochet snail! It’s a project that’s sure to bring a little extra joy and a lot of handmade love into your life.
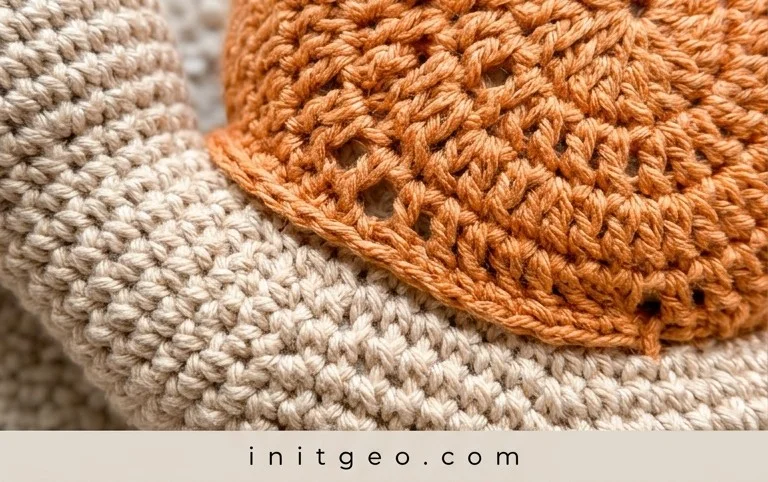
And there you have it – your very own charming crochet snail amigurumi! We hope this pattern inspires your creativity and brings a smile to your face as you stitch. Don’t be afraid to experiment with different yarn colors and textures to give your snail a unique personality! We’d absolutely love to see your finished creations, so be sure to tag us on social media using #[YourSocialMediaHandle] or #[YourPatternHashtag]. Ready for your next crochet adventure? Explore our collection of other adorable amigurumi patterns to keep your hook busy!