Hello fellow crafters! Get ready to embark on a delightfully textured adventure with our new Amigurumi Armadillo Crochet Patterns, featured right here in DIY Magazine!
Imagine a charming, little armadillo, meticulously crocheted with its signature segmented shell and an irresistibly cute, sleepy expression. This project is perfect for unleashing your inner artist, whether you’re a seasoned amigurumi pro or just dipping your toes into the wonderful world of crochet for the first time. These patterns also make for incredibly thoughtful, handmade gifts that are sure to warm any heart, or even add a whimsical touch to your home decor!
Inside, you’ll learn how to create this adorable critter stitch by stitch, mastering essential amigurumi techniques like working in the round, increasing, decreasing, and of course, bringing your amigurumi to life with just a few simple sewing steps. Let’s get our hooks ready and create something truly special!
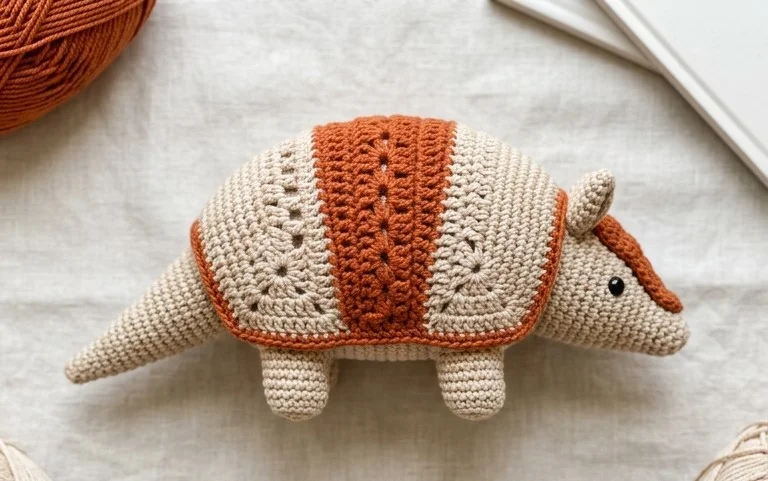
Crochet Your Own Adorable Armadillo: A DIY Magazine Guide
Get ready to embark on a delightful crafting adventure! This DIY Magazine is thrilled to present our exclusive Amigurumi Armadillo crochet pattern. Amigurumi, the Japanese art of crocheting small stuffed yarn creatures, is a wonderfully rewarding hobby, and our armadillo pattern is perfect for both seasoned crafters and enthusiastic beginners alike. With its charmingly segmented shell and sweet, inquisitive expression, this little armadillo is sure to become a beloved companion or a unique handmade gift. Let’s dive into the wonderful world of yarn and hooks to bring this cute critter to life!
Yarn and Hook Recommendations: Building Your Armadillo’s Cozy Shell
Choosing the right yarn and hook is crucial for creating a well-shaped and durable amigurumi piece. For our armadillo, we recommend using a worsted-weight yarn. This weight strikes a perfect balance: it’s substantial enough to create a good, firm fabric that won’t have large gaps, yet it’s not so thick that it becomes cumbersome to work with. Natural fibers like 100% cotton are excellent choices for amigurumi as they are washable, durable, and hold their shape beautifully. Cotton also offers a lovely matte finish that’s characteristic of many amigurumi creations.
For an even more luxurious feel and a slight sheen, consider a cotton-acrylic blend. These yarns often combine the best of both worlds – the breathability and structure of cotton with the added softness and washability of acrylic. When selecting colors, think about the natural hues of armadillos. Varying shades of brown, tan, and beige are perfect for the body and shell. You might also want a contrasting color for the belly and inner ears, perhaps a lighter cream or soft pink.
The hook size will depend on your yarn choice and your personal tension. A good starting point for worsted-weight yarn is a 3.0mm to 3.5mm crochet hook. We want to achieve a tight gauge so that the stuffing doesn’t show through the stitches. It’s always a good idea to crochet a small swatch with your chosen yarn and hook to check your gauge. If your stitches are too loose, go down a hook size; if they are too tight and difficult to work, go up a hook size.
Stitch Techniques: The Building Blocks of Your Armadillo
Our amigurumi armadillo pattern utilizes a few fundamental crochet stitches that are essential for amigurumi creation. Mastering these will open up a whole world of stuffed toy possibilities!
Tips for Beginners: Navigating Your First Armadillo Adventure
Don’t be intimidated if this is your first amigurumi project! Our armadillo pattern is designed to be approachable. Here are some tips to help you along the way:
Customizing Your Armadillo: A Splash of Personal Flair
The beauty of crochet is the endless potential for personalization! Here are some ideas to make your armadillo truly your own:
Color Variations:
Size Modifications:
While this pattern is designed for a specific size, you can easily adjust it. To make a smaller armadillo, simply use a finer weight yarn (like sport weight or DK weight) and a correspondingly smaller hook size (e.g., 2.5mm). Conversely, for a larger armadillo, opt for a chunkier yarn (like bulky or super bulky) and a larger hook size (e.g., 5mm-6mm). Keep in mind that changing yarn and hook size will alter the stitch count and potentially the number of rows needed to achieve the desired proportions. You may need to do a little bit of trial and error to get the look just right!
Caring for Your Amigurumi Armadillo: Keeping It Lovable
Your crocheted armadillo is a delicate creation, but with a little care, it can be cherished for years to come.
Project Ideas: More Than Just a Toy!
While our amigurumi armadillo makes an absolutely adorable stuffed toy, its charm extends beyond that!
Embarking on this amigurumi armadillo project is sure to bring you hours of crafting joy and a wonderfully huggable result. So gather your yarn, pick up your hook, and let’s get crocheting! Happy crafting!
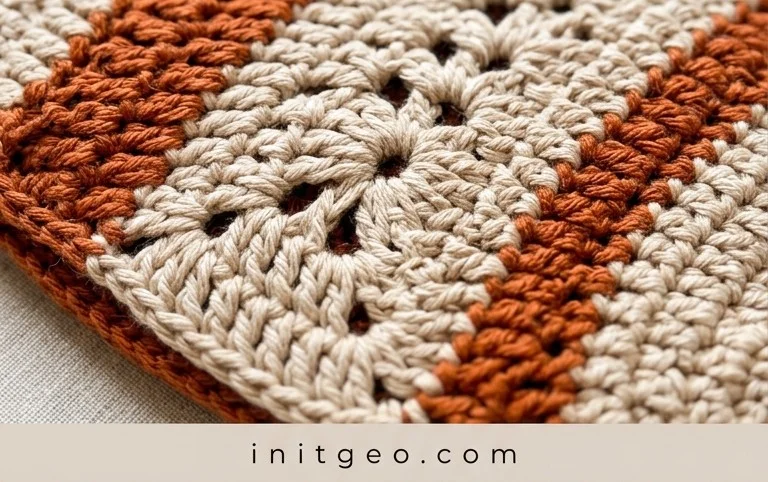
And there you have it – your very own adorable amigurumi armadillo! We hope you’ve had a wonderfully cozy and creative time bringing this little fellow to life. Don’t hesitate to give this pattern a go; the satisfaction of crafting something so charming is truly rewarding.
Once your armadillo is complete, we’d absolutely love to see your delightful creations! Tag us on social media using #[YourMagazineHashtag] and share your finished projects. Feel free to experiment with different yarn colors or add unique embellishments to personalize your armadillo. And remember, this is just the beginning! Dive into our other crochet patterns for more fun and furry friends to stitch up.