Hello, fellow yarn lovers! Get ready to dive into a world of adorable creations with these 8 Flower Turtle Amigurumi Crochet Patterns! If you’re looking for a project that’s as sweet as it is satisfying, you’ve come to the right place.
Imagine a collection of charming little turtles, each sporting a unique and vibrant flower blooming right on their shell! These tiny treasures are perfect for adding a pop of color to any space, from your desk to a child’s nursery. They make the most heartfelt handmade gifts for friends and family, or a delightful treat for yourself!
Whether you’re a beginner just learning to crochet or a seasoned pro looking for some quick and fun patterns, these designs are perfect for you. Inside, you’ll learn essential amigurumi techniques, how to create seamless pieces, and discover the joy of bringing these delightful flower turtles to life, stitch by stitch!
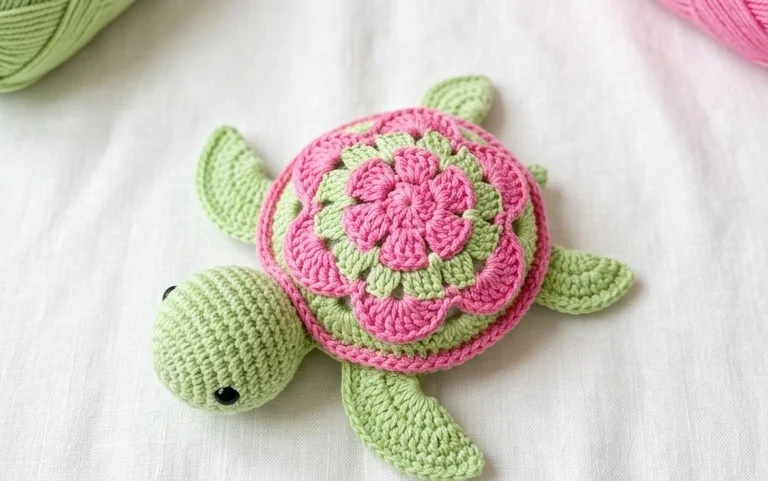
Stitching Sunshine and Shells: A Deep Dive into the 8 Flower Turtle Amigurumi Crochet Patterns
There’s something inherently joyful about a crocheted turtle. Their slow, steady presence evokes feelings of calm and happiness, and when you add the delightful touch of blooming flowers to their shells, you’ve got a recipe for pure crafting bliss! These 8 Flower Turtle Amigurumi Crochet Patterns are an absolute treasure trove for anyone who loves bringing cute creatures to life with yarn. Whether you’re a seasoned amigurumi artist or a curious beginner dipping your toes into the world of stuffed toys, this collection offers something truly special. Let’s embark on a crafting adventure and explore everything these adorable patterns have to offer.
Choosing Your Palette: Yarn and Hook Recommendations
The magic of amigurumi often lies in the yarn, and for these Flower Turtles, a few key characteristics will ensure your creations are both cuddly and durable.
Yarn Weight: Worsted weight yarn is your absolute best friend for amigurumi. It strikes a perfect balance, creating a fabric that’s firm enough to hold its shape without being too stiff, and it works up at a satisfying pace. Cotton or a cotton blend is highly recommended for amigurumi because it has excellent stitch definition, is washable, and holds its shape beautifully. Acrylic yarns can also work, but ensure they are of good quality to avoid a fuzzy or stretched-out look over time.
Hook Size: For worsted weight yarn, a hook size in the range of 3.5mm to 4.5mm (US sizes E/4 to 7) is typically ideal. The key is to choose a hook that is slightly smaller than what the yarn label recommends. This creates a tighter stitch, preventing stuffing from peeking through. You want a fabric that’s dense and squishy, not holey!
Color Choices: This is where the fun truly begins! For the turtles themselves, you can go classic with earthy browns, greens, or even soft grays. But the real showstopper is the flowers. Think vibrant pinks, sunny yellows, cheerful oranges, pretty purples, and calming blues. Don’t be afraid to mix and match! You could also consider ombre yarns for a unique floral effect. For the eyes, black or dark brown yarn is standard, but a contrasting color can add personality.
Mastering the Magic: Essential Stitch Techniques
These patterns, like most amigurumi projects, will rely on a few core crochet stitches. If you’re new to these, don’t worry – they’re quite straightforward and incredibly rewarding to learn.
Magic Ring (or Magic Circle): This is the foundation for creating seamless, tight circles, which is essential for amigurumi. It allows you to start your work with no visible hole in the center. There are several ways to create a magic ring, so find the method that feels most comfortable for you.
Single Crochet (sc): This is the workhorse stitch of amigurumi. It creates a dense, firm fabric perfect for stuffed toys. Practice your tension to ensure consistent stitches.
Increase (inc): To make your pieces grow, you’ll use increases. This typically involves working two single crochets into the same stitch.
Decrease (dec): To shape your amigurumi and make it narrower, you’ll use decreases. The most common method in amigurumi is the “invisible decrease,” where you work through the front loops of two stitches. This creates a neater finish than a standard decrease.
Slip Stitch (sl st): Used for joining rounds or finishing off.
You might also encounter:
Half Double Crochet (hdc): Sometimes used for specific parts or to create slightly different textures.
Double Crochet (dc): Less common in tight amigurumi but might be used for decorative elements.
Crocheting in Rounds: Amigurumi is almost exclusively worked in continuous rounds, meaning you don’t join with a slip stitch and chain at the end of each round. You’ll use a stitch marker to keep track of your rounds.
Your First Blooms: Tips for Beginners
Embarking on your amigurumi journey with these Flower Turtles is a fantastic choice. Here are some tips to make your experience smooth and enjoyable:
Read Through the Pattern First: Before you even pick up your hook, take some time to read the entire pattern from beginning to end. This will give you an overview of the project and help you understand the steps involved.
Use a Stitch Marker: This is non-negotiable for amigurumi! A stitch marker will help you keep track of where each round begins and ends, preventing you from losing your place and ensuring consistent shaping.
Stuffing is Key: Don’t be afraid to stuff your turtle firmly, but also evenly. You want a plush, huggable toy, not a lumpy or floppy one. Use a stuffing tool or the blunt end of your crochet hook to push stuffing into all the nooks and crannies, especially in smaller parts like the head and legs.
Sewing is an Art: Attaching the various parts (head, legs, tail, flowers) is a crucial step in bringing your turtle to life. Take your time with the sewing. Use a yarn needle and stitch securely, hiding your knots within the toy.
Practice Makes Perfect: Your first turtle might not be perfect, and that’s absolutely okay! Each project you complete will build your confidence and skill. Don’t get discouraged.
Watch Tutorials: If you’re struggling with a specific stitch or technique, YouTube is your best friend! Search for tutorials on “magic ring crochet,” “invisible decrease,” or “amigurumi stuffing” – you’ll find countless helpful videos.
A Garden of Possibilities: Customizing Your Turtles
The beauty of these 8 Flower Turtle patterns lies in their inherent customizability. You can create a whole menagerie of unique little friends!
Color Combinations:
Turtle Body: Beyond the basics, consider pastel shades for a softer look, or even bright, unexpected colors for a whimsical touch. Stripes can be achieved by changing yarn color every few rounds.
Flowers: This is where you can really let your creativity bloom!
Single Color Flowers: Simple and elegant.
Two-Tone Flowers: Alternate colors in the petals or center for a more intricate look.
Ombre Flowers: Use a yarn that transitions through several colors for a natural, gradient effect.
Rainbow Flowers: Dedicate each flower to a different color of the rainbow.
Eyes: Black is classic, but consider contrasting colors like white with a black pupil, or even googly eyes for a more traditional toy look.
Size Variations:
Smaller Turtles: To make smaller turtles, simply use a finer weight yarn (like DK or sport weight) and a corresponding smaller hook size. The overall proportions will remain similar, just on a miniature scale.
Larger Turtles: For larger turtles, opt for a bulkier yarn (like bulky or super bulky) and a larger hook. You might also need to adjust the number of increase rows slightly to achieve a desired circumference.
Flower Arrangements:
Number of Flowers: The patterns likely suggest a certain number of flowers per shell, but you can add more or fewer to your liking.
Flower Types: If the pattern offers different flower designs, mix and match them on a single shell for a diverse floral display.
Placement: Experiment with the placement of the flowers. Cluster them in the center, scatter them evenly, or create a specific pattern.
Caring for Your Crocheted Companions
Once your delightful Flower Turtles are finished, you’ll want to keep them looking their best for years to come.
Washing: Hand washing is always the gentlest method. Use cool water and a mild detergent. Gently squeeze out excess water, but avoid wringing or twisting, which can distort the shape.
Drying: Lay your turtles flat on a clean, dry towel in a well-ventilated area. Reshape them gently while they are damp. Avoid direct sunlight or heat sources, as these can cause colors to fade or fibers to shrink.
Spot Cleaning: For minor spills or marks, a damp cloth with a tiny bit of mild soap can often do the trick. Gently dab the affected area.
Storage: Store your amigurumi in a cool, dry place away from direct sunlight and harsh chemicals.
Beyond the Bloom: Project Ideas for Your Turtles
These adorable Flower Turtles are perfect as standalone creations, but they also lend themselves to a variety of charming projects:
Individual Gifts: They make wonderfully thoughtful and handmade gifts for birthdays, baby showers, or just because.
Party Favors: Imagine a basket overflowing with these little guys as favors for a garden-themed party!
Home Decor: Place them on shelves, mantelpieces, or in a nursery for a pop of color and whimsy.
Baby Mobile: String them together with other crocheted elements to create a sweet and personalized baby mobile.
Desk Companions: A little turtle friend on your desk can bring a smile to your face during the workday.
Keychain Charms: For smaller versions, add a keychain ring to create adorable and unique bag or backpack charms.
Part of a Larger Scene: Use them as characters in a larger crocheted diorama or playmat.
These 8 Flower Turtle Amigurumi Crochet Patterns are more than just a set of instructions; they’re an invitation to create joy, stitch by stitch. With a little yarn, a hook, and a dash of creativity, you’ll soon have a whole garden of these blooming beauties gracing your home and the homes of your loved ones. Happy crocheting!
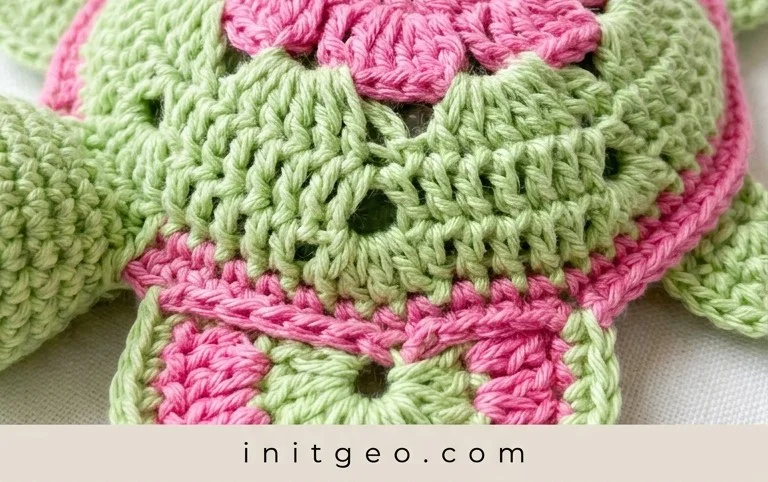
We hope you’ve enjoyed exploring these adorable 8 Flower Turtle Amigurumi crochet patterns! Now it’s your turn to bring these charming creatures to life. Don’t be shy – grab your yarn and hook and dive into the joy of creating your very own cuddly companions. We can’t wait to see your finished masterpieces! Tag us on social media with your unique creations – your vibrant colors and sweet details might inspire others.
Feel free to experiment with different yarn weights, hook sizes, and color combinations to make each turtle truly your own. Perhaps add a tiny bow or a different flower accent! And when you’re ready for your next crochet adventure, be sure to browse our collection for even more delightful patterns. Happy crocheting!