Hello, fellow yarn lovers! Get ready to add a touch of starry magic to your life with these absolutely delightful Amigurumi Star Pillow Free Crochet Patterns!
Imagine a plump, plush star, ready to be cuddled, displayed on a bed, or hung as a cheerful accent. These charming little fellows are incredibly satisfying to create and bring an instant dose of whimsy to any space. Whether you’re a complete beginner taking your first stitches or an experienced crocheter looking for a quick and fun project, this pattern is for you!
Perfect for gifting to little ones (or the young at heart!), adding a pop of color to your living room, or even as a unique baby shower present, these star pillows are sure to be a hit. Dive in, and let’s learn how to bring these cuddly constellations to life, stitch by glorious stitch!
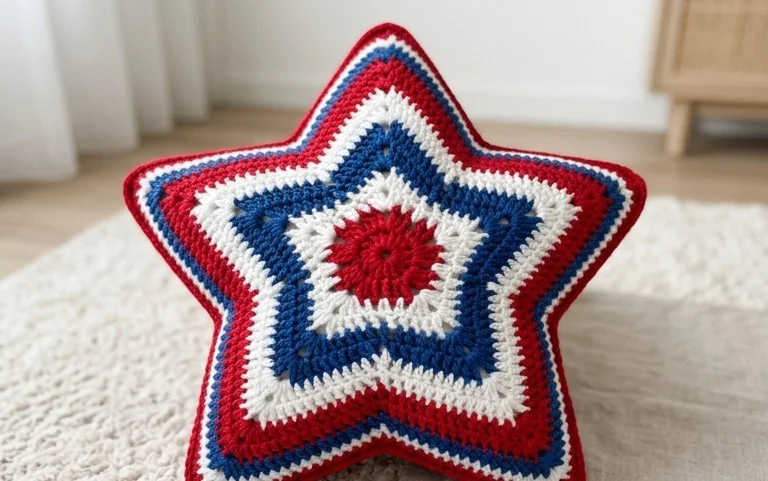
Craft a Celestial Companion: Unlocking the Magic of the Amigurumi Star Pillow Crochet Pattern
The night sky, a canvas of twinkling wonders, has long inspired us with its boundless beauty. Now, you can bring a piece of that celestial magic into your home with the delightful Amigurumi Star Pillow crochet pattern. This charming project, perfect for adding a whimsical touch to any room, is surprisingly accessible, even for those newer to the world of amigurumi. Get ready to crochet your very own starry friend, a cozy and captivating creation that’s as fun to make as it is to display!
This article will guide you through every step of bringing this Amigurumi Star Pillow to life. We’ll cover everything from selecting the perfect yarn and hook to mastering the essential stitches, offering tips for beginners, and exploring creative ways to personalize your star. Plus, we’ll delve into how to care for your finished masterpiece and brainstorm some fantastic project ideas.
Your Stellar Starting Point: Yarn and Hook Recommendations
Choosing the right materials is the first step in any successful crochet journey. For your Amigurumi Star Pillow, we recommend opting for worsted-weight yarn. This is a fantastic choice because it’s readily available, offers a good balance between sturdiness and softness, and works up at a comfortable pace. Cotton or a cotton-acrylic blend are excellent choices for amigurumi as they hold their shape well and are durable.
When it comes to hook size, a 3.5mm (E/4) or 4.0mm (G/6) crochet hook is generally ideal for worsted-weight yarn when making amigurumi. The key is to crochet tightly. This creates a dense fabric that prevents stuffing from peeking through your stitches. You might even consider going down a hook size from what’s recommended on your yarn label to achieve this desired tightness. Experimenting with a small swatch will help you find the perfect tension for your specific yarn and hook combination.
Mastering the Magic: Essential Stitch Techniques
The Amigurumi Star Pillow pattern relies on a few fundamental crochet stitches that are the building blocks of most amigurumi projects. Don’t be intimidated; these are skills you’ll quickly master!
A tutorial for the invisible decrease is highly recommended for beginners. It involves inserting your hook into the front loop of the first stitch, then into the front loop of the second stitch, yarn over, and pull through both loops. Then, yarn over again and pull through the remaining two loops on your hook. This creates a much neater finish than a standard decrease.
A Helping Hand for New Crafters: Tips for Beginners
Embarking on your first amigurumi project can feel a little daunting, but the Amigurumi Star Pillow is a wonderfully forgiving pattern. Here are some tips to make your journey smooth and enjoyable:
Unleash Your Creativity: Customizing Your Star Pillow
The beauty of crochet is its inherent adaptability! Your Amigurumi Star Pillow is a blank canvas waiting for your personal touch.
Color Combinations to Spark Joy
The possibilities are as vast as the night sky! Consider these ideas for color customization:
Playing with Size and Scale
While the pattern provides specific stitch counts for a standard size, you can easily adjust it:
Caring for Your Celestial Creation
Your handcrafted Amigurumi Star Pillow is a treasured item, and with a little care, it will bring joy for years to come.
Beyond the Pillow: Inspiring Project Ideas
While the Amigurumi Star Pillow is a star in its own right, this pattern can be adapted for a universe of other projects:
Crocheting the Amigurumi Star Pillow is more than just making a craft; it’s an act of creation, a way to imbue your space with handmade charm and personal flair. So, gather your yarn, pick up your hook, and let your creativity shine as brightly as the stars themselves!
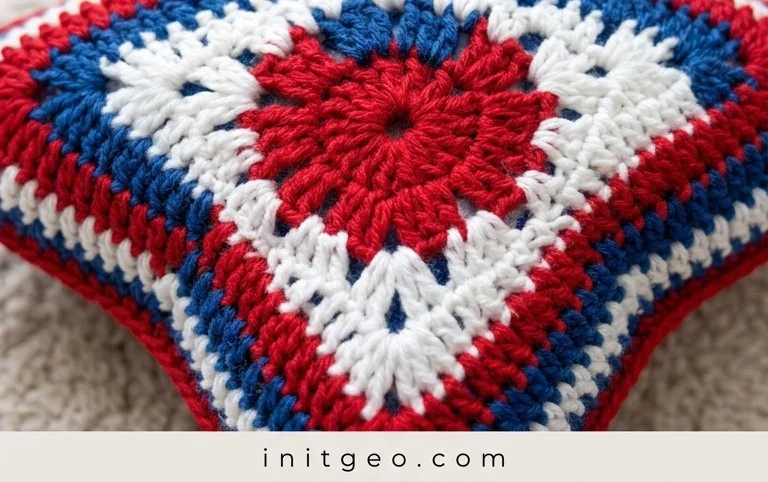
We hope you’ve enjoyed this delightful collection of Amigurumi Star Pillow crochet patterns! These starry creations are perfect for adding a touch of handmade magic to any room, and they make wonderful gifts too. Don’t hesitate to grab your hook and yarn and give one of these adorable patterns a try – you might be surprised at how quickly they come together!
Once your star pillow is complete, we’d absolutely love to see your finished projects! Share your stellar creations on social media using #AmigurumiStarPillow and tag us so we can admire your handiwork. Feel free to get creative with different yarn colors, embellishments, or even try combining star shapes for a truly unique design. And for more crochet inspiration and free patterns, be sure to explore the rest of DIY Magazine!